111_cameraMatch tutorial
This is a small tutorial for maxscript called 111_cameraMatch
1. get a photo you want something to put into, let it be a house in this case, let's take this one. Avoid cropped pictures.

2. start the script in 3dsmax

3. push "select texture" button and select your image, you get this

4. go to front view

5. modify lines according to perspective lines in the image. You can
set selfillumination of the plane to 100 in older 3dsmax versions. Try to place lines so they have more blunt angle, like this

6. push "solve" button, you have two cameras created.

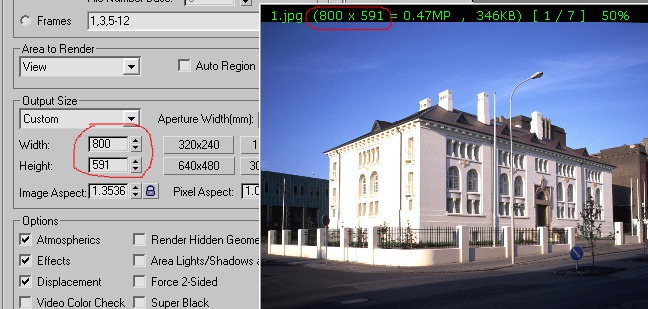
7. change the render resolution to the dimensions of the image (I will
probably add this step to the script in the next version, current
version is 0.2)
8. the second camera is aligned to... let's call it "picture's world",
as if the beginning of coordinates represented the corner of the
building.

9. hide (or delete) the plane with image (as well as helper spline, and
not aligned camera) and put your image as background for your aligned
camera view

10. align the box corner with building corner using "truck camera tool" or middle mouse button (just pan the camera)

11. that's mostly done, modify you cube to look like a building to check parallel lines or whatever

that's all.